- File
-
Designs
-
-
All Categories -
Category #1 - New Category
-
My designs
-
-
Help
-
Quick help
- ctrl+a
Select all objects
ctrl+d Double the activate object
ctrl+e Clear all objects
ctrl+s Save current stage to my design
ctrl+o Open a file to import design
ctrl+p Print
ctrl++ Zoom out
ctrl+- Zoom in
ctrl+0 Reset zoom
ctrl+z Undo changes
ctrl+shift+z Redo changes
ctrl+shift+s Download current design
delete Delete the activate object
← Move the activate object to left
↑ Move the activate object to top
→ Move the activate object to right
↓ Move the activate object to bottom
shift+← Move the activate object to left 10px
shift+↑ Move the activate object to top 10px
shift+→ Move the activate object to right 10px
shift+↓ Move the activate object to bottom 10px Fill color for image or text
Changing the color for an image or text is simple using the fill tool. Just select the layer then use the fill tool as seen below:

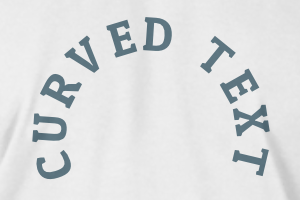
How to make curved text
First, select the text layer you want to curve, then press the Text Effects icon (item #2 in the image below), a settings box will appear. Select the Curved Text effects (item #3 in the image below) to apply.
You may need to adjust the Radius and Spacing to make the text fit properly.

How to make text with a background
First, we have to add text and an image into the design area, then with the image selected in the design area click the mask tool (as shown here):

A new window will appear similar to this one:

Select the text layer you wish to mask, wait a few seconds as it processes. When done, completed mask will appear such as this:

Crop Image
To crop an image after adding into design area, just click on image and select crop tool as shown in image below:

The popup will appear allowing you to resize/crop your image as desired:

The image will be cropped with the exact position you put into the viewer.
There are some tweaks to make your image align better such as:
Center: move selection to center of image
Horizontal center: move selection align to horizontal center
Vertical Center: move selection top align to middle
Square: make selection square
After selected area, just press Save button
Remove Background from Image
First, select the image then click on the remove background button as seen here:

The popup will appear allowing you to remove the background as desired:

There are 2 options you can edit when removing a background. The tool will help and some images will work better than others. First, you need to select Light Background or Dark Background. Then using the slider "Deep" adjust until you are happy with the result. This is a basic tool and may not work 100% for all images. Please contact our team if you need custom Graphic Design help with your image.
Using Image Filters
Just like your phone, product designer comes with many image filters to help make your designs POP! To use them, just add an image to your design area and with it selected click on the Image Effects icon as seen here:

The popup will appear allowing you to add filters to your image as desired:

How to move layer to front of other one
When you add an object (any object) like text, clipart, images, etc, they each sit on what is called a layer. Think of layers like sheets of paper, one on top of the other sitting on your desktop. You can rearrange those 'layers' any way you want causing your design to look different based on what is in front or behind another object...make sense? Good! :)
So to change these layers, just click on the Layers menu item to the left of the design space. You'll see all the objects that your added to your design listed there. To change the order, just drag and drop them above or below each other.

You can also move things forward or backward directly from your design area using the Arrange Layers icon as seen here:

- So you have created the perfect design on a coffee cup and added it to your shopping cart to purchase but you like it so much you'd like to get coasters to match. Of course you don't want to go through the time to re-create the design again for the coaster...no worries, we have you covered.
With your design there in the design area, just click the "Change Product" button in the upper left:

A window with additional products will appear, just click on the new product you want and your design will now be placed onto the product you choose. You can add additional text, images, etc or leave it as it is, the choice is yours.

-
Copyright © 2019 CoolMo Design
All Rights Reserved.Powered by Lumise version 2.0.1
-
- Shop
- Undo
- Redo
- 0.0
-
My Cart
- Back To Shop
- Design
- Product
- Templates
- Cliparts
- Images
- Text
- Shapes
- Layers
- Drawing
- Backgrounds
- Distress
Click or drop images here
Click or drag to add text


Free drawing mode
Save this color
Tips: Mouse wheel on the canvas to quick change the brush size
Bug Reporting
Please let us know if you find any bugs on this design tool or just your opinion to improve the tool.
Tips: If you want to send content with screenshots or videos, you can upload them to imgur.com or any drive services and put links here.
-
Start designing by adding objects from the left side
- All selected objects are grouped | Ungroup?
- Group objects Group the position of selected objects
-
-
Fill options
Save this color
-
-
Options
-
Automatically align the position of <br>the active object with other objects -
ON: Keep all current objects and append the template into<br> OFF: Clear all objects before installing the template -
Replace the selected image object instead of creating a new one -
Select the way how the background image addon display
-
- Replace image
- Crop
-
Mask
-
Select mask layer
-
-
Remove background
-
Remove background
-
Deep:
-
Mode:
-
-
Filters
-
Filters
-
- Original
- B&W
- Satya
- Doris
- Sanna
- Vintage
- Gordon
- Carl
- Shaan
- Tonny
- Peter
- Greg
- Josh
- Karen
- Melissa
- Salomon
- Sophia
- Adrian
- Roxy
- Singe
- Borg
- Ventura
- Andy
- Vivid
- Purple
- Thresh
- Aqua
- Edge wood
- Aladin
- Amber
- Anne
- Doug
- Earl
- Kevin
- Polak
- Stan
-
Brightness:
-
Saturation:
-
Contrast:
-
- Clear Filters
- Click then drag the mouse to start drawing. Ctrl+Z = undo, Ctrl+Shift+Z = redo
- QRCode text
-
Fill options
-
Fill options
Save this color
-
Transparent:
-
Stroke width:
-
Stroke color:
-
- Ungroup position
-
Arrange layers
-
Position
-
Object position
Lock object position:
-
Center vertical
-
Top left
-
Top center
-
Top right
-
Center Horizontal
-
Middle left
-
Middle center
-
Middle right
- Press ← ↑ → ↓ to move 1 px, <br>Hit simultaneously SHIFT key to move 10px
-
Bottom left
-
Bottom center
-
Bottom right
-
-
Transforms
-
Rotate:
-
Skew X:
-
Skew Y:
-
Flip X:
Flip Y:
Free transform by press SHIFT+⤡
-
-
Font family
-
Edit text
-
Edit text
-
-
Font size:
-
Letter spacing
-
Line height
-
-
Text Effects
-
Text effects
-
-
Radius
-
Spacing
-
Curve
-
Height
-
Offset
-
Trident
-
-
Text align
- Uppercase / Lowercase
- Font weight bold
- Text style italic
- Text underline
Scroll to zoom